Paper pendants are fun and easy to make. You probably already have most of the supplies around your house. Also, by following these instructions, you are helping the environment by reusing some food packaging boxes you can’t recycle. Let’s get started!
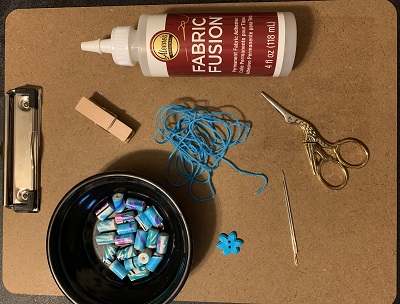
Supplies
Creating the Pendant
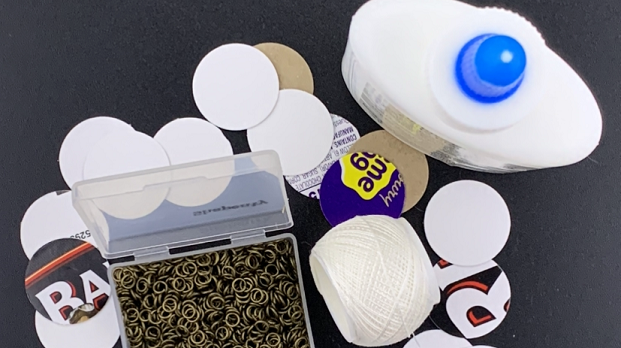
- Punch out several 1-inch circles from the food packaging or whatever you’re using for the base of the pendant.
- Stack the circles together until they are as thick as you want your final pendant. I stack mine about 1/8-inch thick. That translates to 6 circles for non-frozen food packaging boxes and 4 circles for frozen food packaging.
- Split the circles from step 2 into two piles.
- Prepare your nonstick drying surface in front of you, along with the toothpick and school glue.
- Pick up one of the circles from one of the piles. Put some glue on one side of the circle and use the toothpick to spread it across that side of the entire circle in a thin layer. Be sure to spread the glue all the way to the edges.
- Place another circle from the same circle pile on top of the glued side. Press the circles together and run your fingers along the outside edges to align the circles.
- Repeat steps 5 and 6 until you’ve glued all the circles from one of your circle piles.
- Put the completed half pendant down on the nonstick surface.
- Pick up one of the circles from the second pile of circles and repeat steps 5 through 8.
- Tie a piece of embroidery floss to one of the jump rings. For this, I keep the floss on the spool while I’m tying the jump ring, then cut the string, leaving about two ½-inch tails of floss hanging off the jump ring.
- Pick up one of the halves of your pendant and glue one side as you did in step 5.
- Place the jump ring’s strings on top of the glue so that the strings are in the glue and the jump ring is clear of the circle, hanging off the edge.
- Pick up the other half of your pendant and press it to the glued side as you did in step 6.
- Put the completed pendant base on the nonstick surface.
- Punch out one 1-inch circle from the cardstock you chose for the top of the pendant.
- Pick up the pendant, then use the toothpick again to spread glue on one side of the pendant as in step 5.
- Carefully place the cardstock circle on the glued side of the pendant as in step 6, ensuring that this circle is oriented the way you want relevant to the jump ring, as this will be the top of the pendant when worn.
Sealing the Pendant
- When the school glue is completely dry on the pendant, use your small paint brush to cover the entire pendant with a thin layer of Mod Podge. This will create a seal that will extend the life of the pendant.
- Leave the pendant to dry completely, preferably hanging from the jump ring to not smudge the coating of Mod Podge.
- When the Mod Podge coat is dry, paint a thin layer of Dimensional Magic or Diamond Glaze on the pendant to give it a glossy, glass-like finish when dry.
- Leave the pendant to dry completely before wearing, selling, or giving away as a gift. Again, preferably hanging to not smudge the final coating.
When you are comfortable with the process, you can make these in batches like I do, by making batches of half pendants and preparing enough jump rings for the total number of pendants I’m making. Then, I assemble the halves and jump ring strings for all the pendants as well. Finally, I seal and finish them in batches too.
If you try this craft, let me know how it goes! Stay safe and healthy, and happy crafting!
Source for this project: Pie Chart Pendant Project